
Apple has released a new app called Invites that is designed to make it easy to create custom invitations for events using an iPhone or on the web. Invites is Apple’s version of Partiful, a popular invitation app that was crowned Google Play’s Best App of 2024.
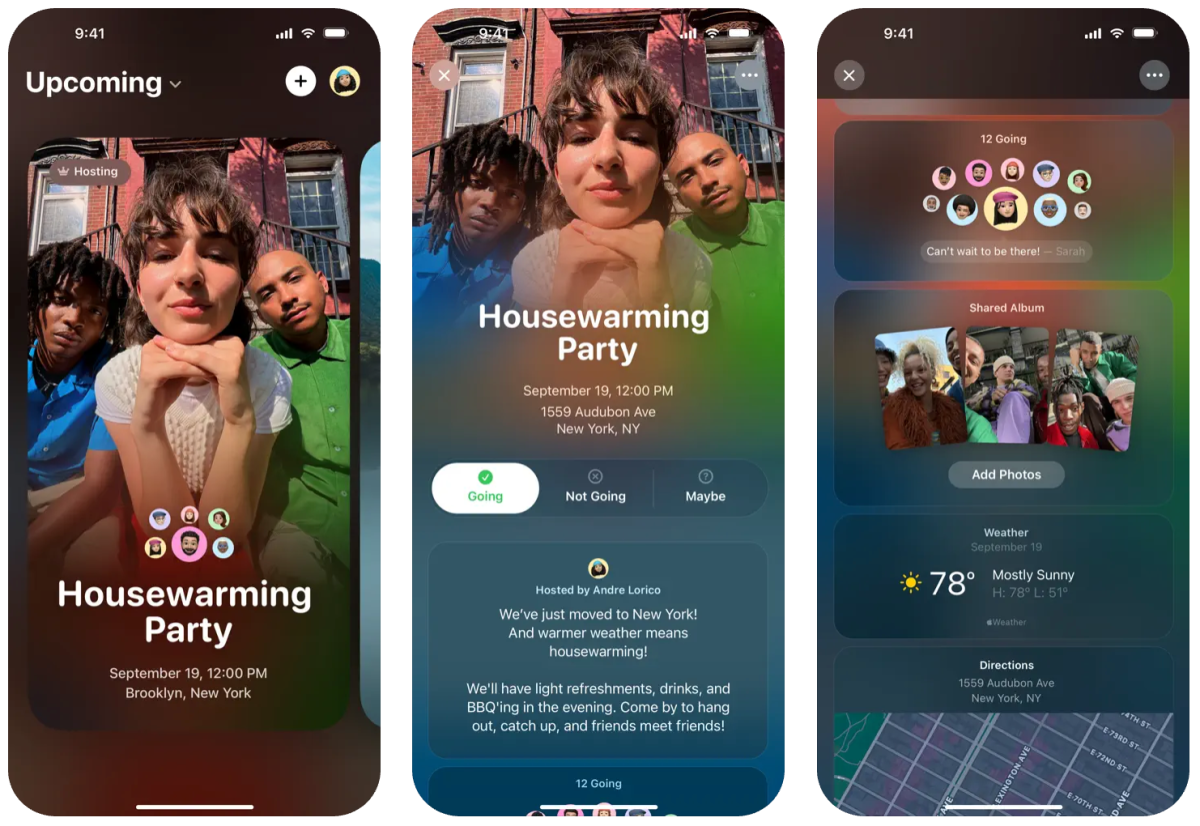
Invites lets you create and share invitations, RSVP to events, contribute to Shared Albums, and curate event soundtracks.
To create an invitation, you need an iCloud+ subscription, which costs 99 cents per month. However, anyone can RSVP, regardless of whether they have an Apple Account or Apple device.
In this post, we’ll walk you through the process of creating an event, adding a shared album or playlist, and sending out your invitation to guests.
Creating an Event Invite

You can create an event in Apple Invites using the app on your iPhone or on the web at iCloud.com. The process is essentially the same regardless of the device or location.
If you’re on the app, tap the plus sign in the upper-right corner to create an event. If you’re on the web, you need to select “New Event” in the upper-right corner.
From here, tap the “Add Background” option and choose “Photos” to select an image from your library or tap the “Camera” option to take a new photo for the background. Apple also offers a selection of backgrounds for you to choose from.
Alternatively, you can use Apple’s Image Playground to produce original images for the background. This feature requires an iPhone that is compatible with Apple Intelligence, which means you need an iPhone 15 Pro and up.
Once you have added a background image, tap “Event Title” to enter the name of your event and choose a font style.
Then, tap “Date and Time” to choose the day and time the event starts and ends. You can also choose to set it as an all-day event. After you set a date, the weather forecast for that date will be added to the invitation.
Next, tap “Location” to search for a location or tap a suggested location. You have the option to enter a name for a location, such as “Emily’s House.” When you set a location, Invites will automatically add Apple Maps information to the invitation.
Finally, you can enter a description for the event, using Apple Intelligence’s Writing Tools to help you write out the description, if you’d like.
Once you have created your event, you can tap the “Preview” option to see what it looks like before sending it to your guests.
Creating a Shared Album or Playlist for your event invite

Apple Invites offers two additional features that can enhance your invitations: Shared Albums and Playlist. These features allow attendees to contribute to the event, saving memories and allowing them to relive the event later. To create a Shared Album, you need to tap the “Create Album” option and follow the prompts to finish creating the album.
You can also create a playlist by selecting the “Add Playlist” option. Attendees can contribute songs to the playlist before or during the event. Please note that you need an Apple Music subscription to create a shared playlist. Like Shared Albums, a playlist will have the name of your event, but you can edit it.
Inviting Guests to Your Event

There are two ways to invite guests to your event: sharing a public link or sending it to specific people from your contact list. To share a public link, select “Invite Guests” and choose one of three apps to share the link from: Messages, Mail, or share the link directly. If you select a contact, you can search for their name, choose from your contact list, or enter their name manually and share the link with them.
To invite guests, select “Invite Guests” to start sending out invitations. A public link will be generated that you can share with guests. Alternatively, you can choose to send the invitation as a message or via the Mail app. You can also copy and paste the link to invite guests through any app in your iOS share sheet. Once you’ve invited your guests, you can send a note to everyone on the guest list to share updates or reminders.
To do so, select your event and then tap “Send a Note.” Write out your message, and then tap the “Send Note” button.
Source Link